
OBD II.
Read codes.
Get clarity.
Connect your scanner, understand the results and know what to check before clearing a code.
Download scanner guide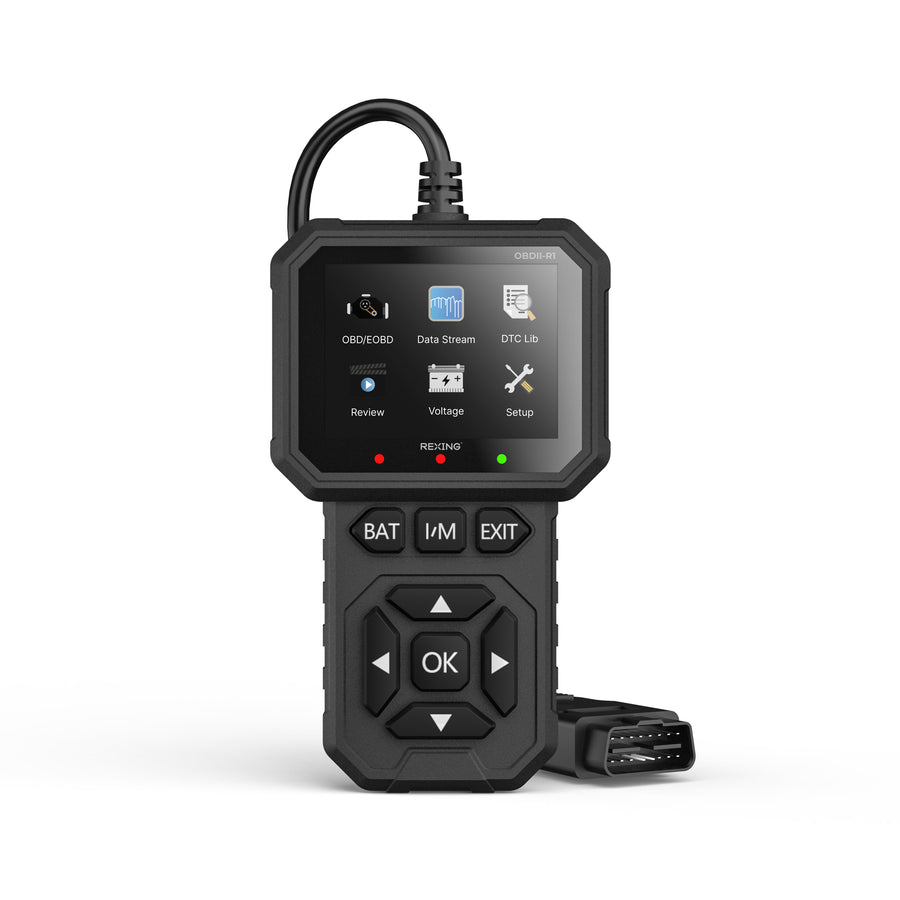
Your first diagnostic check.
Use the scanner for supported OBD II engine and emissions functions. Available data and tests depend on the vehicle.
Park safely
Secure the vehicle before connecting. Locate its diagnostic port using the vehicle handbook. Never operate the scanner while driving.
Connect the scanner
Seat the connector fully. Follow the guide and vehicle instructions for the ignition state required by the test. Run an engine only in a well-ventilated area.
Open Diagnosis
Select Diagnosis, then press OK. Use the arrow keys to choose a function and OK to enter. EXIT returns to the previous menu.
A code is a clue.
Keep the context.
A trouble code identifies a detected condition. It does not by itself prove which part needs replacement.
Read DTC
Review the fault code and displayed definition. Save the exact code and vehicle details for diagnosis.
Freeze frame
View the recorded snapshot of engine conditions associated with a fault, when the vehicle provides it.
Live data
Review supported engine data as it changes. Interpret values alongside vehicle specifications and operating conditions.
Save your results before clearing codes.
Record codes and freeze-frame information first. Clearing codes does not repair a fault and may reset emissions readiness. Clear only when appropriate after diagnosis or repair, following the guide.
Three labels. Different meanings.
Readiness tells you whether a supported emissions monitor has completed its check. It is separate from a repair diagnosis.
Completed
The monitor has completed its check.
Incomplete
The monitor has not finished. Specific driving conditions and time may be required.
Not supported
The vehicle does not support that monitor.
Find your next step.
Keep the vehicle make, model, year, engine and exact on-screen message ready when contacting support.
The scanner does not power on.
Check that the connector is fully seated and the vehicle's diagnostic port has power. Consult the vehicle handbook for the relevant fuse. Stop if the cable or port is damaged; ask a qualified technician to inspect it.
It powers on but cannot communicate.
Confirm the required ignition state and connection, then retry using the guide. Not every function is supported by every vehicle. Send support the vehicle details and exact connection error.
The code comes back after clearing.
The vehicle may still be detecting the underlying condition. Save the returning code and when it appears, then have the cause diagnosed. Clearing the same code repeatedly does not fix it.
Why does readiness show INC?
A monitor may need more time or specific driving conditions, particularly after codes are cleared. Use the vehicle manufacturer's procedure; avoid clearing codes again while waiting for monitors to complete.
Can it diagnose ABS or airbags?
No. This scanner is designed for emission-related engine diagnostics. ABS, airbags, oil-life resets and older OBDI vehicles are outside its supported scope.
Your scanner resources.
Need help with a result?
Share the exact code and vehicle details. A technician can help diagnose the underlying vehicle fault.